Congrats, you just signed up for YNAB! Now what?
Where do you start with YNAB?
Before asking for YNAB help, this YNAB setup guide is intended to walk you through a step by step setup of your YNAB account.
What makes YNAB confusing?

When you first explore YNAB, it feels a bit confusing.
It’s a new software for you and it requires a mindset shift from how you’ve always thought about money.
You’ve gotta build in an adjustment period to adjust to YNAB terms and nuances.
What is ready to assign? How do I plan future dollars?
The way we traditionally think about budgeting (or don’t think about it) in a spreadsheet needs to be set aside.
Here are some of the confusing aspects of YNAB:
- You can only budget dollars you have.
- All income is classified as ‘Ready to Assign’.
- Separate bank accounts don’t matter and actually make it more complex (this was a learning curve for me personally).
Only Budgeting Money You Have
One of the most difficult things to adapt to in YNAB is assigning a job only to the dollars you currently have.
It doesn’t let you plan for future money that you will get.
In fact, if you do try to allocate money that you don’t have yet, you can’t rely on the accuracy of your budget.
As money enters your bank account, you typically think of it as income or try to create an account for your income.
In YNAB, you assign all income as ‘Ready to Assign’.
This is saying you have money that is ready to be allocated to your budget accounts. When you look at your profit and loss report it will still show as income, it’s just a different naming convention.
Adjusting to YNAB's lingo
In YNAB, you assign all income as ‘Ready to Assign’.
This is saying you have money that is ready to be allocated to your budget accounts. When you look at your profit and loss report it will still show as income, it’s just a different naming convention.
Multiple Bank Accounts in YNAB
The hardest thing for me to adapt to in YNAB was consolidating all bank accounts.
I used to have a separate bank account for different purposes – savings, bills, food, personal spending.
Tracking all of the transfers became tedious and when you allocate your money it may not align to the amount in each individual account.
So consolidating all cash to one account makes the process much easier.
But I wouldn’t make a drastic change like that until you begin to feel comfortable managing your money in a different way.
Once you adapt to the nuances, YNAB changes the way you look at money management!
With those nuances in mind, let’s get started with YNAB!
Step by Step YNAB setup
STEP 1: Create a new YNAB budget
STEP 2: Link bank accounts & credit cards to YNAB
STEP 3: Setup category groups in YNAB
STEP 4: Setup your accounts in YNAB
STEP 5: Create YNAB target for each category
STEP 6: Compare underfunded amount to your income
STEP 7: Budget your ready to assign dollars
STEP 8: Review your spending
If you’re looking for a step by step YNAB setup checklist, you can download it here too!
STEP 1: Create a new YNAB budget
Navigate to the top left corner and select the plus sign to create a new budget. The below screen will appear for you.

Give your budget a name and select the settings that fit your needs.
The first step is done! See budgeting is easy 
STEP 2: Link bank accounts & credit cards to YNAB
On the left side of your screen, select ‘Add account’.

I prefer to have linked accounts because I don’t want to manually add transactions. The less resistance the better when managing your money in YNAB!
Some users prefer Unlinked accounts because Linked YNAB accounts can have a few day lag.
Some prefer Unlinked so they are more hands on.
Call me lazy – I want the system to do the heavy lifting for me.
Follow your preference!
Follow the prompts to add all bank accounts and credit cards you own to your budget.
As you link up your bank accounts, you’ll see the ‘Ready to Assign’ amount increase. We’ll review that later.
Once your accounts are linked to YNAB, move to the next step.
You’re breezing through setting up your budget! This is why YNAB is the best money management tool on the market!
STEP 3: Setup category groups in YNAB
Now we’re starting to enter the weeds of budgeting.
Brace yourself!
The best part about personal finance and money management is that it’s personal! It’s helpful to get tips and pointers from other YNABers, but you’re ultimately looking for a consistent way to manage your money for yourself.
Set up your budget in a way that helps you stay consistent and manage your money!
So remember, what works for me might not work for you and that’s okay!
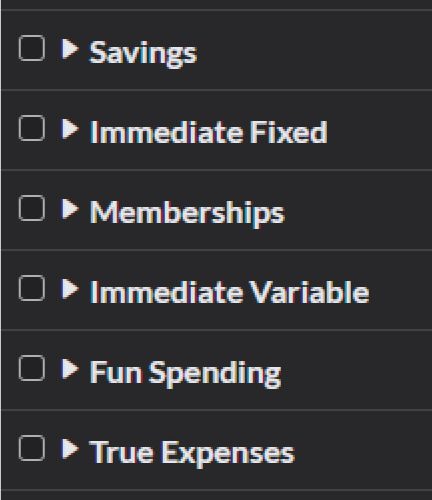
Category groups are high level groupings so you can see similar expenses together. They allow for better roll ups and trend observations so you can observe your habits.
Here’s the framework I provide to my clients when setting up their budgets.
Your category groups will grow and change over time.
You’ll find a way that works for you and as you get deeper into money management it will change. Embrace the change!
I like this method because it allows for high level spending trend management.
Give it a go as a starting place and modify it to your situation!
STEP 4: Setup your accounts in YNAB
As you spend your money, you classify the spending to accounts.
The accounts will also grow and change as you progress through budgeting.
In your initial setup, you won’t hit all the areas you need. That’s okay.
Just give a high level estimate of areas you spend your money.
YNAB gives you common category groups and accounts that you can use as a baseline and modify as you need.
Some examples of YNAB accounts are rent/mortgage, electric, water, sewer, groceries, dining out, entertainment, etc.

STEP 5: Create YNAB target for each category
When you click on an account, a screen on the right side appears that allows you to create a target.

Targets also set apart YNAB from other personal finance tools.
Say you have an annual $240 expense like auto registration. YNAB lets you set a target so that by the time your policy renews, you’ve set $20 aside each month to pay the bill.
THIS IS ONE OF THE BEST PARTS OF YNAB!!
No more “surprise” expected bills.
After you decide to add a target, you’ll need to select a goal type. YNAB provides a brief explanation of the goal types.
The most common are ‘Needed for Spending’ and ‘Monthly Savings Builder’.
Repeat the target setup for each account and move to the next step.

STEP 6: Compare the underfunded amount to your income
After you create your targets, you’ll need to confirm if your target allocations would lead to you overspending.
Select all categories.
When you select all, you will see the YNAB shows an amount on the right side of your screen called ‘Underfunded’.

You’ll need to compare your underfunded amount to your income.
If you downloaded the net worth spreadsheet, you’ll have reconciled your income already and will know what amount to tie to.
If not, take a high level estimate of what amount of money hits your bank account as income monthly.
You can be slightly over in your target allocations, but you don’t want to be significantly over.
As close as you can get the better.
Then you know that every dollar you earn has a job.
Once you get to a point where your targets are aligned to your income, you’re ready to start assigning your money a job!
STEP 7: Budget your ready to assign dollars
Ready to assign basically collects all money that has not been assigned a job.

The goal is to get the amount in ‘ready to assign’ to zero.
You know your immediate needs best, so assign your money based on your needs. If you have a healthy amount to assign, here is the recommended approach.
If you have an emergency fund, assign your dollars to your emergency fund.
If your credit card debt is at manageable levels, then you should assign money to pay off your credit card statement balance.
It’s always beneficial to pay off credit cards because of the obnoxiously high interest rates. Stop giving away your money for free!
Assign your money to pay your bills and your variable needs.
If there is money left after covering your necessities, move onto some more fun money spending or other items that are unique to your budget.
After getting ready to assign to zero (and not negative!), you are ready to move onto the last step of your beginners guide to getting setup in YNAB!
STEP 8: Review your spending
When you linked up your accounts, it may have pulled in some of your recent transactions.
If it did, you can go back to each account and assign your spending to the appropriate account.
If you did a manual sync, you will need to categorize your spending.
Whenever you have new transactions to categorize, you’ll see a small dot next to the bank account or credit card.
You’ll want to do a weekly YNAB review and perform a monthly YNAB review to begin to build serious wealth!
Congratulations!
You’ve officially finished the YNAB quick start guide and have created your budget in YNAB!
YNAB will change the way you look at and plan your money.
I’m so happy you’ve decided to get started in YNAB and learn how to manage your money well! If you need any YNAB help or have any questions at all, please reach out!
I love helping people just like you learn to budget, break money mindset myths, and change the way they look at money!